

Opening Hook
The first time I tried making Twix-style cookies at home, I thought I could just melt some caramel candies and call it a day. That didn’t go well. The caramel turned hard after cooling, and biting into it felt like a workout. After a few attempts (and switching methods), this version finally gave me that soft, layered texture I was aiming for.
Why This Recipe Works
Here’s the thing—what makes these work is balancing the layers. The cookie base is soft but sturdy enough to hold the caramel, and the caramel itself stays creamy instead of turning into a sticky brick. What I figured out is that controlling the caramel texture matters way more than anything else.
Ingredient Notes
I use a basic sugar cookie dough as the base because it holds its shape better than something like a chocolate chip dough.
For the caramel, I prefer making a quick stovetop version with butter and brown sugar instead of using store-bought caramels. It tastes better and stays softer.
Milk chocolate is key if you want that classic Twix flavor. I’ve used Hershey’s and Cadbury—both worked fine.
How to Make It
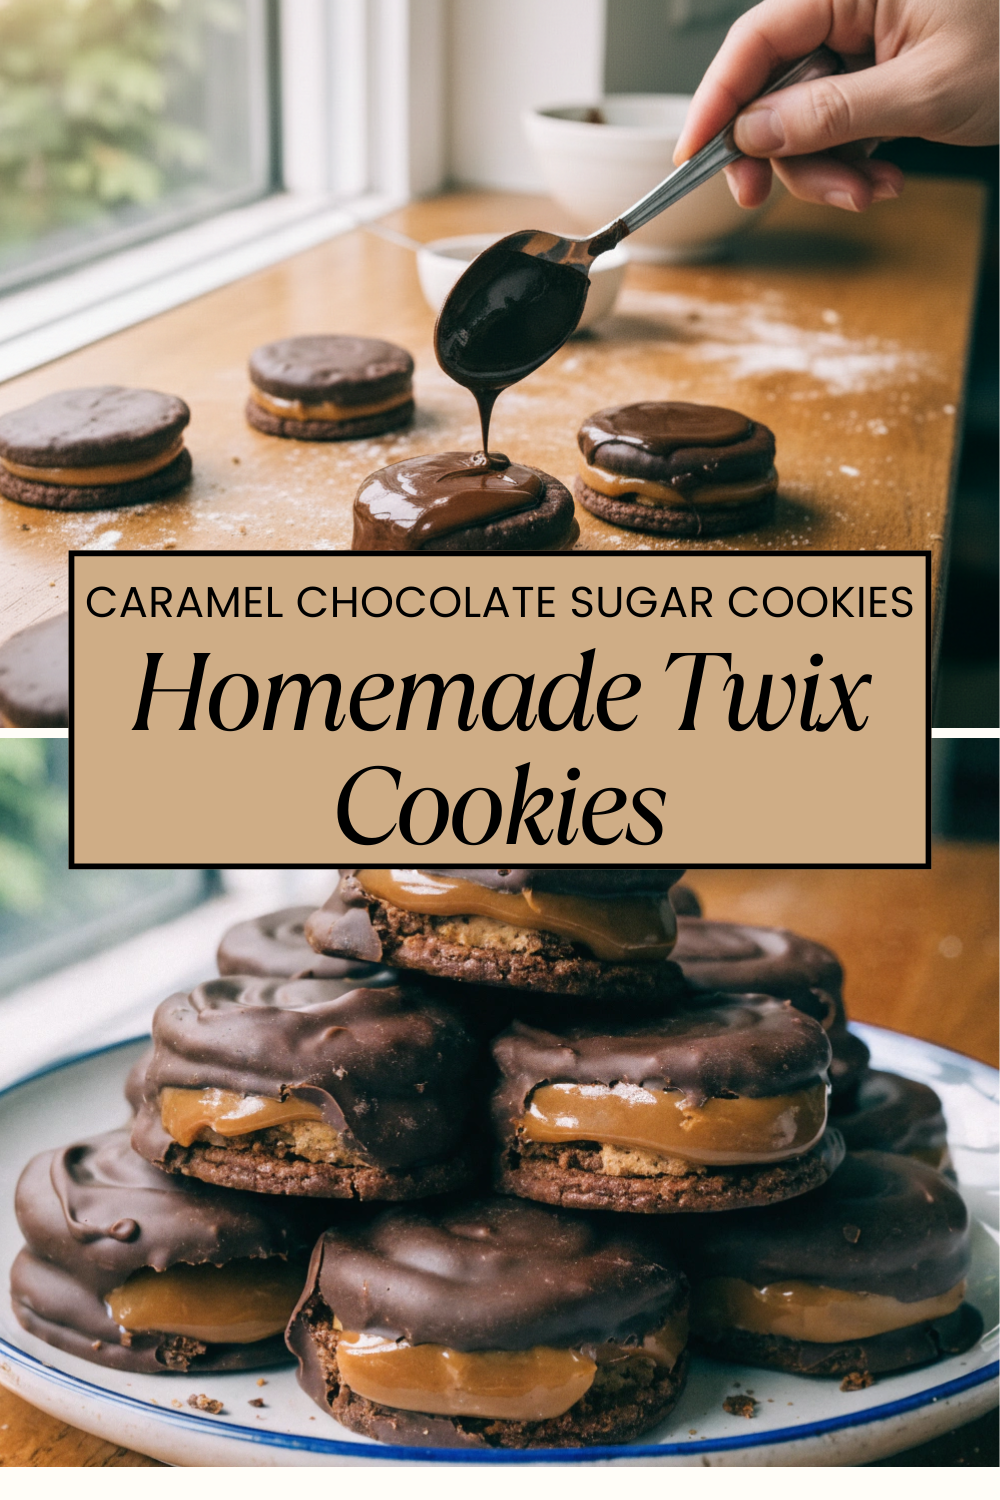
I start by making the cookie base. I cream butter and sugar together until smooth, then mix in the egg yolks and vanilla. After that, I add the flour and salt until it forms a soft dough. It shouldn’t be sticky, but not dry either.
I press the dough into small circles on a baking sheet instead of scooping—it gives that flat, even base that works better for layering. Then I bake them until the edges are just starting to turn golden. Don’t overbake here—I did that once and ended up with cookies that were too hard to bite through once the caramel set.
While the cookies cool, I make the caramel. In a saucepan, I melt butter with brown sugar and a bit of milk, stirring constantly. It thickens after a few minutes into a smooth, creamy consistency. The first time I made it, I stopped too early and it stayed runny, so make sure it actually thickens.
Once the cookies are cool, I spoon a layer of caramel on top and let it set slightly. Then I melt the milk chocolate and spread it over the caramel layer. It doesn’t need to look perfect—in fact, mine usually looks a little uneven, but it still works.
I let everything sit until the chocolate firms up. If I’m impatient, I stick them in the fridge for a bit.
Things I Learned the Hard Way
Don’t rush the caramel. If it’s too thin, it’ll slide right off the cookie.
Let the cookies cool completely before adding caramel. Warm cookies will melt it and make a mess.
Use a small amount of caramel per cookie. Too much makes them hard to eat.
Chocolate sets faster in the fridge, but it can lose a bit of shine—something I stopped caring about after the second batch.
Storage & Serving Suggestions
These keep well in an airtight container for about 4 days. I usually store them at room temperature unless it’s hot, then I move them to the fridge. They’re good on their own, but honestly, they go fast enough that serving isn’t really an issue.


Leave a Reply