
The first time I made Star-Spangled Cake Pops, I honestly underestimated how annoying they can get. I thought it would be simple: bake a cake, crumble it, roll it, dip it, done. What actually happened was sticky hands, crumbling balls that wouldn’t hold shape, and chocolate coating that seized up halfway through.
But once I figured out the timing and ratios, these Star-Spangled Cake Pops turned into one of the most reliable 4th of July desserts I bring to parties. They’re portable, colorful, and people grab them faster than sliced cake because there’s no mess.
They’re also one of those desserts that looks like you spent hours on them, even when you didn’t.
Why These Star-Spangled Cake Pops Work
Cake pops fail for predictable reasons: too much frosting, cake that’s too dry, or coating that’s too thick and cracks when it sets.
The version I make works because the structure is controlled from the start:
- The cake is baked just enough to stay moist but not greasy
- Frosting is added slowly so the mixture binds without becoming mushy
- Balls are chilled properly before dipping
- Candy coating is thinned just enough to stay smooth
Most people rush the chilling step. That’s the biggest mistake. If the cake balls aren’t firm, they fall apart in the coating and you end up restarting half the batch.
Ingredients You’ll Need (And What Matters Most)
Cake Base
I usually go with a simple vanilla or white cake mix. Homemade cake works too, but boxed mixes are actually more consistent for cake pops because they’re slightly drier, which helps binding.
Frosting
Vanilla buttercream or canned frosting both work. The key is not overusing it. Too much frosting turns the mixture into paste instead of dough.
Candy Coating
White candy melts are the base for dipping. I avoid real chocolate here because it’s less stable and more sensitive to temperature changes.
Patriotic Decorations
- Red and blue candy melts or drizzle
- Sprinkles (red, white, blue mix)
- Optional edible glitter for party trays
How to Make Star-Spangled Cake Pops
Baking and Preparing the Cake
Start by baking your cake according to the box or recipe instructions. Don’t underbake it—soft cake is actually worse for cake pops because it turns too sticky when mixed.
Once baked, let it cool completely. Warm cake ruins the texture immediately.
Crumble the cake into fine pieces. I use my hands instead of tools because it gives better control over texture.
Mixing and Forming Balls
Add frosting a little at a time. This is where most mistakes happen.
You’re looking for a texture that feels like soft dough, not wet batter. If it sticks heavily to your hands, it’s too much frosting.
Roll into evenly sized balls and place them on a tray lined with parchment paper.
Chilling the Cake Balls
This step is not optional. Chill for at least 1–2 hours.
If you skip or shorten this step, the cake pops will fall off the stick or crack in the coating.
Dipping and Decorating
Melt white candy coating until smooth. If it feels too thick, add a small amount of coconut oil or shortening.
Dip the tip of each stick into the coating before inserting into the cake ball—this helps them hold.
Then dip fully and gently tap off excess coating.
Immediately add red and blue drizzle or sprinkles before the coating sets.
Things I Learned the Hard Way
The first batch I ever made completely fell off the sticks because I didn’t chill them long enough.
Another mistake was using too much frosting. The mixture turned into something closer to icing than dough and wouldn’t hold shape.
I also learned not to overheat candy melts. Once they burn, they turn grainy and unusable.
And honestly, making them in a warm kitchen is a bad idea. Temperature control matters more than people expect.
Variations to Try
Chocolate Star-Spangled Cake Pops
Use chocolate cake with white candy coating for a richer flavor contrast.
Red Velvet Patriotic Pops
Red velvet cake naturally gives a patriotic base color with white and blue decoration.
Oreo Cake Pops
Crushed Oreos mixed with cream cheese instead of cake create a no-bake version.
Mini Cake Pops
Smaller versions are easier to handle and work better for kids’ parties.
Storage, Freezing & Reheating
Store cake pops at room temperature for up to 2 days if the environment is cool.
In the fridge, they last up to 1 week but may sweat slightly when removed.
They freeze well:
- Freeze uncoated or fully coated
- Store up to 2 months
- Thaw in fridge before serving
Avoid reheating—cake pops are meant to be served cold or room temperature.
What to Serve With Star-Spangled Cake Pops
These work well alongside:
- Brownies and cookie bars
- Fruit platters
- Ice cream cups
- Lemonade or iced drinks
- Other handheld desserts
They’re best as part of a mixed dessert table.
FAQ
Why do my cake pops fall off the stick?
Usually because the cake balls weren’t chilled enough or the coating wasn’t used to “glue” the stick in place first.
Why are my cake pops cracking?
This happens when cold cake meets hot coating. Let cake pops sit slightly before dipping.
Can I use homemade cake?
Yes, but boxed cake mixes are more consistent and easier to bind.
How do I keep cake pops smooth?
Make sure the coating is fully melted and thin enough. Overheating causes graininess.
Can I make cake pops ahead of time?
Yes, they can be made 1–2 days ahead or frozen for longer storage.
Do cake pops need to be refrigerated?
Not always. Room temperature is fine if serving within 48 hours.
Closing
These Star-Spangled Cake Pops are less about perfection and more about control. Once you get the texture and chilling right, they become one of the easiest grab-and-go desserts for any summer party.
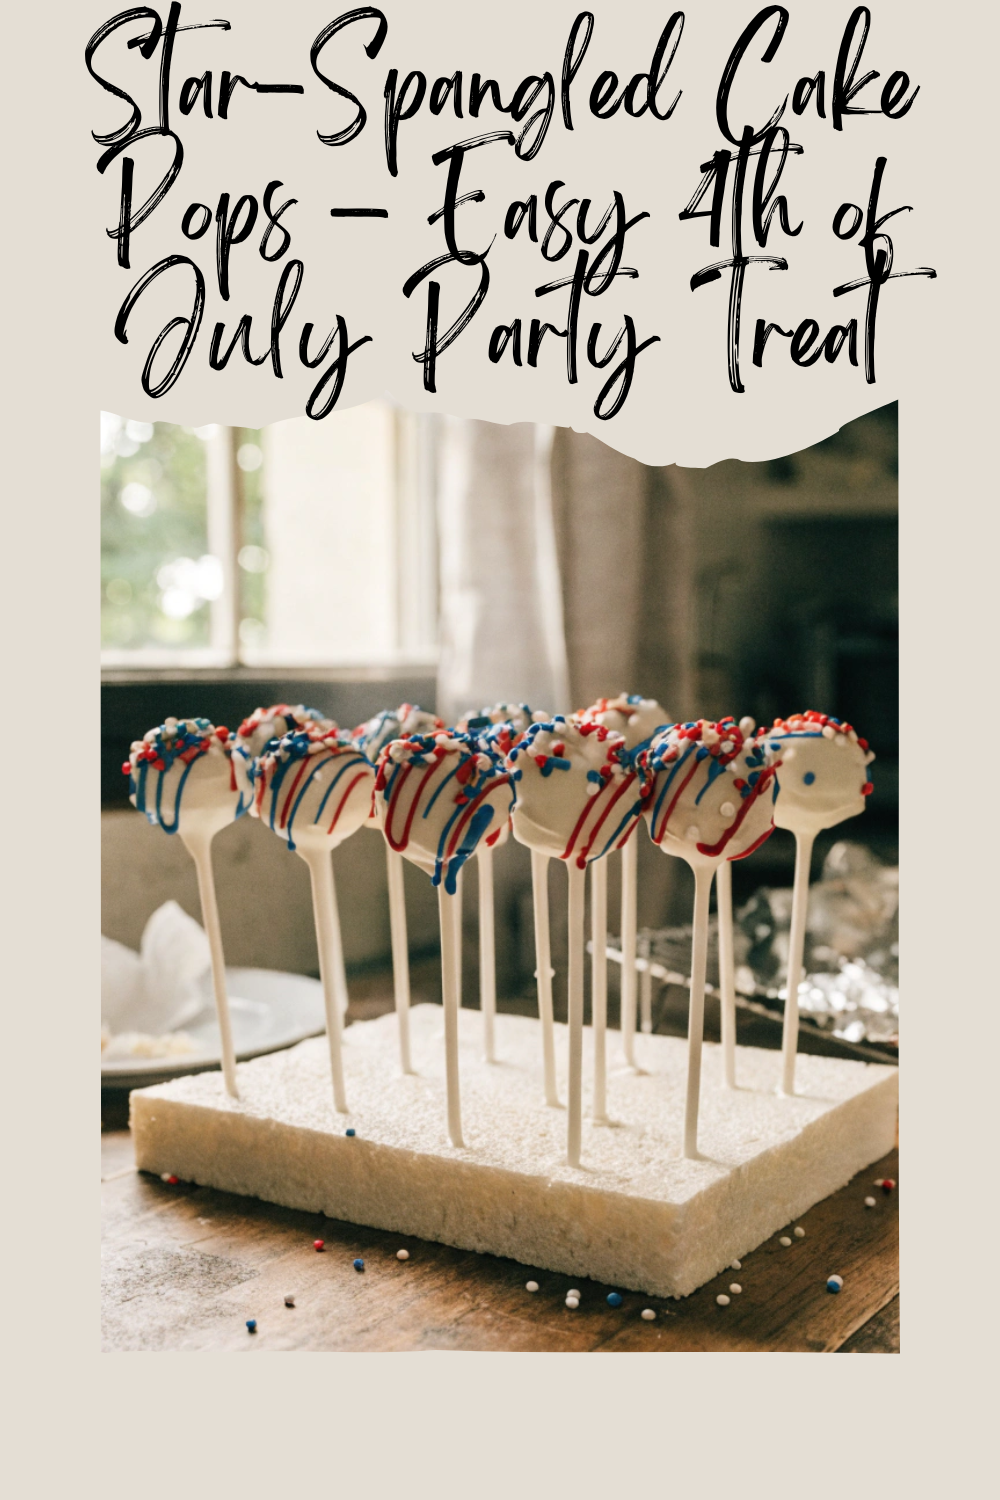

Star-Spangled Cake Pops – Easy 4th of July Party Treat
Ingredients
Method
- Bake cake according to package or recipe instructions. Let it cool completely.
- Crumble cake into fine crumbs in a large bowl.
- Add frosting gradually and mix until dough holds together when pressed.
- Roll mixture into 1-inch balls and place on parchment-lined tray.
- Chill cake balls for at least 1–2 hours until firm.
- Melt white candy melts until smooth; thin slightly if needed.
- Dip stick into coating, insert into cake ball, and let set for 2–3 minutes.
- Dip each cake pop fully into coating, tapping off excess.
- Add red and blue drizzle or sprinkles immediately before coating sets.
- Let set upright until fully hardened.
Notes
Do not overuse frosting or texture becomes too soft to roll.
Chill time is critical for structure and clean dipping.
Candy melts should be warm, not overheated, to avoid grainy texture.
Store in cool dry place for best texture (avoid heat/humidity).

Leave a Reply